Showing posts with label card challenges. Show all posts

Monday, February 28, 2011

Monday, February 28, 2011 Card Challenge - "And I Quote..."


Hello, cardmakers - this week's challenge is to use a quote on your card! Leave us a comment letting us know where to find your stuff...and I'll leave you with a quote, to kick things off..."You can't use up creativity. The more you use, the more you have." (Maya Angelou)

Happy Creating!!

Monday, February 7, 2011

Monday, February 7, 2011 Card Challenge - Love, Love, Love!!!


With Valentines Day drawing near, a 'Love' card challenge is the obvious choice, isn't it? You can never have too many 'love' cards though...after all, there are 364 other days every year that deserve a little love too! So, whether your focus is specifically Valentines Day, or any other day or reason to send a little love, leave a comment with a link where we can go to see your loving best!

Monday, January 24, 2011

Monday, January 24th, 2011 Card Challenge - 'Send A Little Sunshine'!


Happy Monday! What better way to add a little sunshine to an often unappreciated day than by spending a little time exercising your creative abilities? In my little corner of the world, it is a very grey, very rainy morning and so what better excuse do I need to cocoon away with my scrapping supplies?

Today's card challenge is to 'Send A Little Sunshine' in the way of a 'Thinking of You' or 'Hello' card...in other words, a little bit of unexpected happy mail for somebody you care about.

Tuesday, January 11, 2011

Monday, January 10 - First Card Challenge of 2011...

Hello, and Happy New Year!! I'm not a big New Year's Eve party person, and I'm not one for resolutions either, but I do feel a sense of renewal and rejuvenation on January 1st. That's the day we pack Christmas away around here, which gives a great sense of completion and closure to the season and allows me to turn my thoughts to what's ahead. I thought that a great card challenge to kick off the beginning of another year of birthdays is to build up a selection of cards ahead of time.

I am so guilty of being a last-minute person. In fact, one of my mottos is: If it wasn't for the last minute, I wouldn't get anything done! This posting is a classic example. Card challenges at The Inspired Scrapper come out on (every second) Monday. It's Tuesday today. Need I say more? Another saying I find myself using a lot is, "A day late and a dollar short". (Sigh...) If I were to try a resolution on for size, it would be to plan (and execute) ahead. It has been noted that it wasn't raining when Noah built the ark!

The wonderful Debby Visser was, of course, capable of getting her posting for this challenge done on time, as seen in her posting below. Debby says that her 'lady' cards are more available than masculine or child-friendly birthday cards. It is the same for me. I find it somehow easier to whip out feminine cards, but not so much cards suitable for men, and rarely cards for kids. So, I have feminine cards aplenty for this challenge, but NO cards for men or kids.


My plan/intention/wish is to spend some time today focusing just on cards for the men and the children in my family and my social circles whose birthdays are ahead this year. I find that once I sit down and actually get started, the mojo starts flowing pretty easily. Without making promises I can't keep, I will say that I hope to post those cards here soon.

In the meantime, I challenge you to get a great start to this year's coming occasions by getting going on your cards. One last saying that applies: Some people dream of success while others wake up and work hard at it! Be sure to share with us what you come up with by leaving a comment and a link on this post!

Enjoy the process!
Thanks,
Jillian.

Monday, December 27, 2010

Not your standard size/shape Card Challenge by Cari Locken

Hi there!
Cari here with another post for this wonderful card challenge - creating cards that are not a standard shape or size. First of all, I trust that you've all had a wonderful Christmas with your families. We had a great time here.

I love making cards! I admit, though, that I tend to stick to the same sizes when I make them. Probably because I like to get the most out of my paper. ;)

However, I can share one that I created in the shape of a party hat.

Supplies used: American Crafts paper, ribbons & rub-ons, Kaiser Craft rhinestone flowers, Fiskars border punch
And here's another one that measures 3" x 7". Not a typical size but it's a fun one.
Supplies used: Cosmo Cricket papers, chipboard, and "for you" die-cut, Prima (Flowers), ribbon, buttons, twine, Bazzill Basics Cardstock.

This card measure 4" x 5". Another non-traditional shape but it works.

Supplies used: Bazzill Basics cardstock, MME papers, Fiskars border punch, flowers (Prima and Kasier Craft), ribbon (May Arts), rub-ons (Pebbles)

I really should start making more with a unique shape because they are really fun.
This is an older one that I made with a card set. It's actually a pocket with a tag tucked inside. (sorry for the not-so-great photo).
Supplies used: Bazzill Basics cardstock, SEI papers, Melissa Frances rub-ons, decorative scissors, ribbon (May Arts)

I hope that we've challenged you to try some new shapes, designs and sizes when you create your cards. I'm definitely going to start using my Cricut for some of these as well because the possibilities are endless.
Have a great week!!

Not your standard size/shape card challenge - Jo West

Happy Day after boxing day!  Now that the mad rush to the mall is over ... well almost over, some of those deals go on for a week, it's time to grab a warm beverage and get inspired to make some cards!  This week we are challenging you to make cards that are not your standard 5 1/2 by 4 1/4 inch sized cards ...


The long and short of it ...  I love making cards from scraps, and most times my scraps don't work with the standard card size ... so instead, i make cards according to the envelope sizes i have on hand ... in this case, i had some business envelopes hanging around the house, perfect for a tall skinny card and some very tiny square 3 1/2" envelopes ... great for gift cards ... the banners on the tall card were hand cut triangles again from scraps of paper.  i cut them on the fold and glue dotted them to "hang" on the baker's twine.


The not so square of it ... and every once in a while, just for fun, i might make cards that have a different shape ... I don't have access to a lot of "shapes" so i tend to download templates from Stampington & Company when i want to make a shaped card.  Both of the cards below are templates from there.  For those of you with cricuts or other die cutting systems, you have access to probably hundreds of shapes from which to make a shaped card.  I usually use shaped cards for special occasions and invitations.


This teacup was super easy to do ... I just traced the tea template, and cut every thing out except the top which i used as the fold ... the sentiment is stamped onto the tag which hangs in a "tea bag" on the outside of the card.


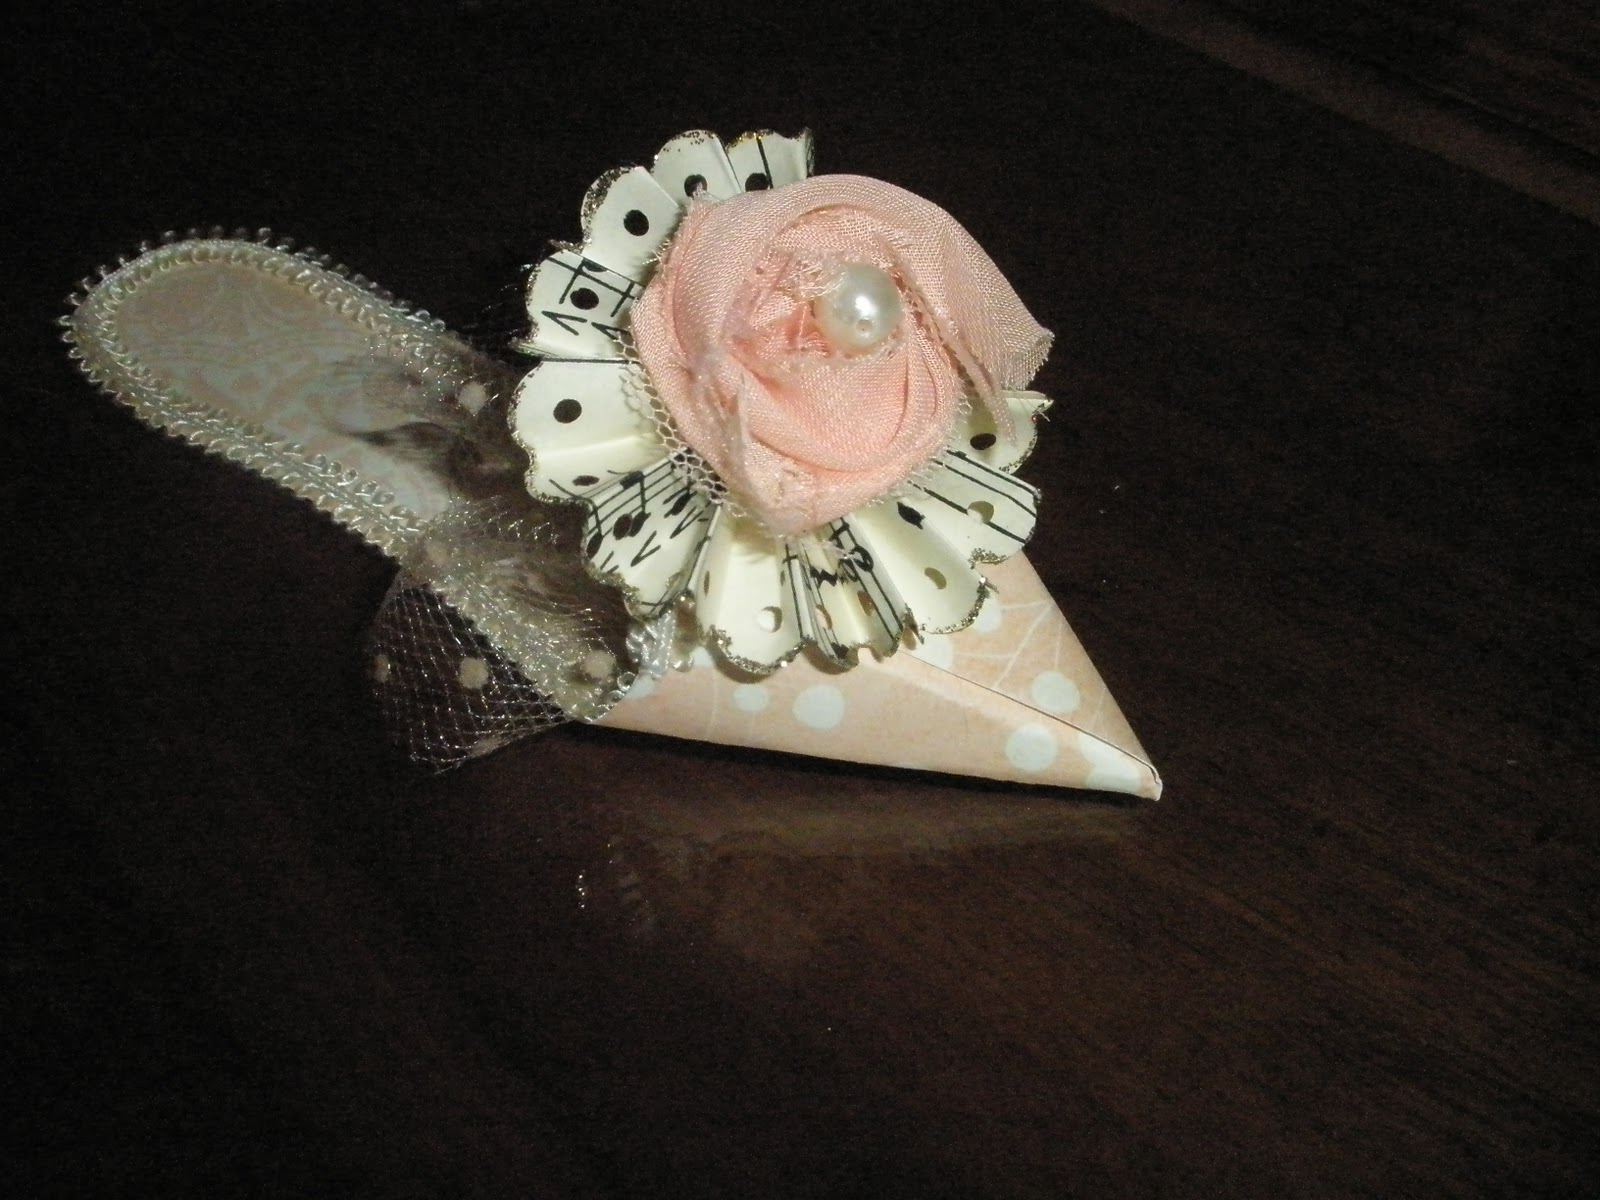
This little shoe card is cute when attached to a gift bag or wrapped present.  You can stamp your sentiment write into the "sole" of the card, or you can write a little message, roll it into a scroll, tie with ribbon and slip it inside the shoe ... if the shoe fits!


We would love to see what  you do with this challenge, please link up to us so we can visit your page or blog, happy shopping and have a wonderful New Year!


Monday, November 15, 2010

Winter Inspired Cards ~ Jo West


Brrrr.... feel that chill in the air?  Winter is coming ...  Time to light those fires, cuddle up with a blanket,  and a warm cup of hot chocolate ... but first, lets pull out all of our christmas papers and make some quick and easy winter themed cards!  Having a supply of winter themed cards comes in really handy, especially if you find your November and December too busy to make cards ... Each of the cards shown here can be made in 10 minutes or under ... like i said "quick & easy"


Got strip scraps?  I know i will want to send out some general cards later on in winter ... for this card i just used strip  paper,  punched the lower border, filled the holes with clear stickles, put a little bit of glossy accents on the cheeks of the faces and the blue dots.  I punched out a tag, stamped "hello", added a ribbon boy and its ready!


Got leftover chipboard?  I used a lot of little chipboard accents from last years Cosmo Cricket line ...  they look so cute and add a great big punch to the card without having to do a more time consuming technique.  I also used a little a die cut  acrylic snowflake.


Got leftover packaging?  try saving those clear acrylic packages that embellishments come in ... you can run them through your big shot to make inexpensive embellishments .  Before I attached these three snowflakes to the card, i heated them for a few seconds with my heat gun to bend them a bit ... this gives the card a little more dimension and it creates more shine for the light to bounce off of as there are more angels to catch the light.


Got bling?  I know i will be sending out lots of thank you cards come January ...  and i wanted some glimmer and shine to my cards ... so to get the glimmer going I grabbed my smooch  (glimmer glaze works really well too) and  I painted the rim of a diecut tag and the coloured areas of the snowflake ... I then added three little self adhesive pearls and its all shiny & pretty ... 


Got Birthdays??? Your left over Christmas or winter themed papers and embellishments can still work well for winter birthdays.  In this case i used a snowflake themed paper,  and a chipboard christmas present which can easily pass a birthday present once the sentiment on the card front is clear! ... I added some glossy accents and glitter to the outline of the diecut and the bows on the present, through on a hand made flower and ribbon and again, made a super quick and easy winter themed card.


Got Vintage???  Sometimes i just want to do something vintage looking ...  to make this card, I just went to a free download site, in this case The Graphics Fairy ... downloaded and then printed the card for free ... stamped the sentiment in the bottom corner and painted the snow with smooch and stickled the border.  Once dry I adhered it to cardstock, border punched the edge, added ribbon, a bow and a pin!


So dig out those leftover christmas papers and embellishments and whip up a few super easy and quick cards today! Thanks for reading!


Tuesday, October 19, 2010

Monday Card Challenge! Embossing!

No better way to conquer a Monday than with some creative output, wouldn't you agree? Join us for another card challenge - embossing! Dry embossing, heat embossing...or both! Show us what you came up with...

Monday, October 18, 2010

Monday Card Challenge - Embossing by Cari Locken

I absolutely love the look of embossing. Whether it's been done dry (by embossing on cardstock with Cuttlebug templates) or by stamping and using embossing powders. I just love the end result.

I've done quite a bit of dry embossing and here a few examples.
Both of these I used a Cuttlebug embossing folder on Core'dinations cardstock (which I just love for embossing. It has a different core color so when you sand the embossed image it reveals the image just wonderfully!!)
Supplies used: Core'dinations cardstock, SRM sticker, Prima flower & lace, Queen & Co rhinestones, EK Success punch, twine, Cuttlebug embossing folder

Supplies used: Core'dinations Cardstock, Imaginisce paper, rhinestones used with i-rock tool & chipboard, May Arts ribbon, Cuttlebug embossing folder, EK Success punch

This last one is a card where I stamped the dove image and then sprinkled red glitter embossing powder overtop.

Supplies used: Gelatins stamps & embossing powders, Bazzill Cardstock, American Crafts paper

Thanks for looking and hope you have fun trying some embossing with your cards.

Monday, October 4, 2010

Card Challenge - "For A Friend" by Cari

I know that there have been many times when my friends have needed a shoulder to lean on, a prayer said on their behalf, a listening ear and just a big comforting hug. However, if you live far apart those things aren't always the easiest to do but sending a hand-made-with-love card especially for them can be the best gift ever!

Here are some that I have created with this theme "For a Friend" in mind.

"Sweetest Friend"
Supplies used: Bazzill Cardstock, patterned papers (Daisy Bucket), stamps (Hero Arts and Stampin'Up), flower (KaiserCraft), ribbon (May Arts), corner rounded punch (EK Success). brads (American Crafts)

"Great Friend"
Supplies used: Bazzill Cardstock, Paper Trunk (patterned papers), Prima flower, twine, EK Success punches, stamp (Hero Arts), ink (Colorbox), button (unknown)

"Sending Sunshine"
Supplies used: Core'dinations Cardstock, October Afternoon patterned paper, American Crafts felt flower, ribbon (May Arts), punches (EK Success), stamps (Hero Arts)

So, I hope you'll try the challenge and create a card for a friend. It just may be the sunshine in their day! ;)

Friday, October 1, 2010

Cards, Cards and More Cards! by Virginia

October 2 is World Cardmaking Day. It traditionally marks the day that cardmakers around the world begin creating their stunning Christmas cards. Myself, I have not been organized enough to start making Christmas cards in October! Because of my procrastination, I have gone to a digi card :-)

Cards are a challenge to me. I feel pressured to create an amazing card in a small space. It is actually easier and quicker for me to whip up a 12x12 layout than it is to create a 4.25"x5.5" card...yes that is true! But I also love love love to give and receive a handwritten card with a heartfelt message written inside. And that is the reason why I continue to challenge myself to make cards.

In honour of World Cardmaking Day, here are a few cards that I have made recently.


I would love to see your cards too!
-Virginia

World Cardmaking Day!!!


Happy Friday!  Tomorrow is world cardmaking day ... so why not celebrate by making a card!  I love making cards ... and i don't have loads of stamps, so sometimes i make my cards without stamping a sentiment on the front ... this works for me as i can always grab a premade card and write whatever i want on the inside ... that way i'm not panicking trying to pull together a last minute card.   I also use these little non stamped cards to randomly mail out to friends and family ... you know its one thing to email someone a greeting, but i find everyone just loves getting a random card in the mail with a cheery handwritten note inside.  And speaking of hand written ... did you know that some schools are dropping cursive writing after grade 5?  .... with all of our techy devices, we as a society do not write much ... except maybe the odd signature on a document or form ... so include some of that good old fashioned cursive writing on your handmade card and send some sunshine ... make someone know you are thinking of them and brighten a day!

Monday, September 20, 2010

*NEW* - Card Challenges on Mondays!

Hello, good morning, Happy Monday! As I write this, I am sitting at my computer desk looking out of my upstairs stairwell windows, and let me tell you - it is a very grey, very rainy day in my little neck of the woods!

I interpret this kind of weather to be perfect weather for fixing myself a pot of tea and settling in for some paper play time! (While still juggling the schedules and demands/needs of a preschooler, a gradeschooler, and a highschooler!). But nevermind that, it's doable, right?!

Here at The Inspired Scrapper, we have decided to start posting card challenges every second Monday, with the hope that we can eventually step it up and host a challenge every Monday.

So, without further ado - our inaugural Monday Card Challenge is - Tag It!! Incorporate a tag (or tags!) into a card.

Chriss has provided an amazing example where, not only did she design a card using a tag, but the tag itself actually separates from the card and becomes a bookmark! Very cool idea - a gift and a card all in one! Imagine somebody's pleasure when finding this in their mailbox instead of just the usual flyers and bills?

My card sample is very straightforward and simple. Using a favorite Sizzix die and my handy, dandy Cuttlebug, I cut two different sizes of tags and stacked them, using foam tape in between the two tags to separate and differentiate the layers a little bit. I kept the card very simple with a lot of 'white space' - something I don't usually do. And - that's it! Sometimes going simpler is hard for me - I struggle with the feeling that I have to add more - more layers, more colours, more patterns...more something. I am going to force myself to leave this card as-is by writing a short note to a friend and popping it straight into the mail - no time to think about it! And, for my friend - 'happy mail' arriving in a few days for no reason except to say, 'Hi! I like you!'. I'm sure that she will be so busy smiling that she won't stop to critique my creative touches (or lack thereof!).


Care to join us in our 'Tag It' challenge? Leave a comment letting us know where to go to see your card(s) - we're looking forward to it!!

'Bye for now,
Jillian.